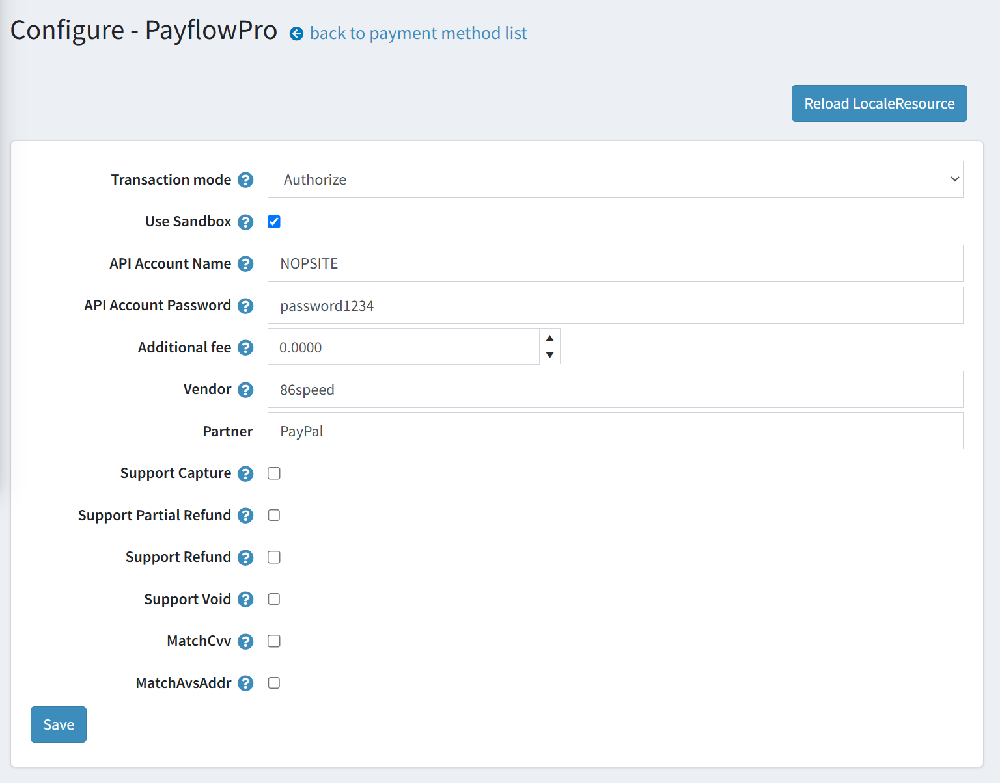
How to Set Up the Payflow Pro Plugin for nopCommerce
1. Select transaction mode:
👉 Authorize – reserves funds, capture later, Authorize and Capture – charges the card immediately
👉 Pick what works best for your order flow—more flexibility for your business needs.
👉 Gives you control over how and when money is collected.
2.Enable sandbox mode (Optional) :
👉 Check the box “Use Sandbox”
👉 This allows you to test the payment process using demo cards—no real money involved.
👉 Great for verifying setup before going live.
3. Enter API credentials:
Fill in these fields carefully:
API Account Name , API Password , Vendor (usually same as account name) , Partner (typically “PayPal”)
👉 These connect your store directly to your PayPal business account—so payments can be processed smoothly and securely.
4. Set Additional Fee (If Needed)
👉 A fixed fee (e.g., ₹25 per transaction)
👉 A percentage (e.g., 2% of order total)
👉 Covers your transaction costs if you choose to pass them to customers.
👉 Completely optional, based on your business strategy.
5. Enable key payment features
Tick these options as needed:
👉 Support Capture
👉 Support Refund
👉 Support Partial Refund
👉 Support Void
👉 These allow you to handle refunds, voids, or late captures directly from nopCommerce.
6. Turn on CVV & Address matching
✔ MatchCvv , MatchAvsAddr
👉 This verifies if the card and address details match the customer.
👉 Creates a secure environment for both you and your buyer.