How to set up the MonerisCA plugin for nopCommerce
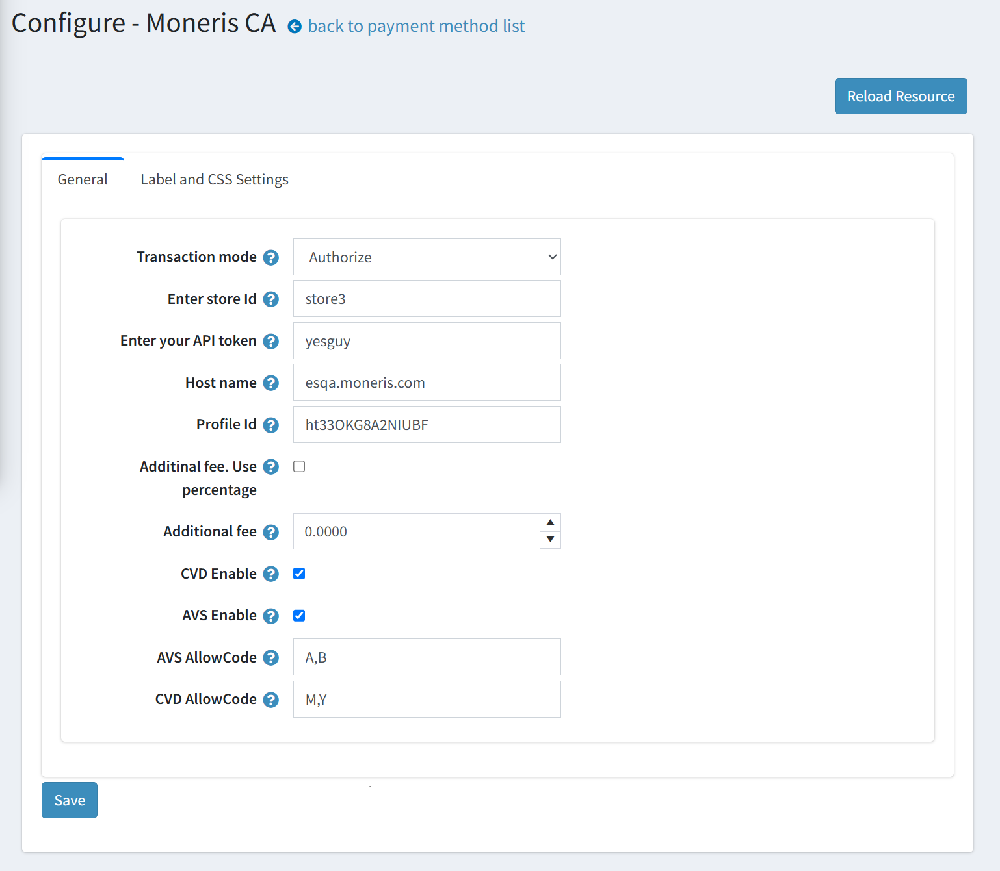
1. Transaction mode : Select if you want to just authorize the payment or authorize and capture it right away—based on how your store operates.
2. Store ID: Add your Moneris-provided store ID (e.g., store3).
3. Enter API Token : Your secure key from Moneris—this keeps your transactions safe and authenticated.
4. Enter Host Name : Use esqa.moneris.com to test safely. Switch to www3.moneris.com when you're ready to go live.
5. Enter Profile ID : This helps Moneris recognize and verify your merchant profile.
6. Set Additional Fee : If you want, you can add a small extra fee to cover payment processing costs.
7. Enable CVD & AVS for safety: Turn these on to verify the card and billing info—helps prevent fraud and protects your store.
8. Set Allowed AVS/CVD Codes : Want extra control? You can choose which verification results you want to accept during checkout.
👉 Simply enter the codes you want to accept, separated by commas.
👉 For example: AVS AllowCode: A,B,D,M and CVD AllowCode: M,Y
👉 Each code is a response from the cardholder’s bank, telling whether the address (AVS) or card digits (CVD) match.